AI Video Studio guide
From a single line of an idea to a finished cut. This guide covers the canvas, the node pipeline, timeline editing, client review and team credits.
Start a project
- Open ai.valzexa.com and sign in (new accounts get 100 free credits).
- On the home screen, tap New video project.
- Pick a template — Blank, Short Drama, Ads or Previs — and choose the space it belongs to.
- Your canvas opens with the node skeleton pre-laid for the template you chose.
The infinite canvas
Everything happens on an infinite canvas. Nodes are the steps; the lines between them are the data flow. Because each node is discrete, you always know where a result came from — and you can change one thing without rebuilding everything.
- Colour-coded states show at a glance what is pending, running, done or failed.
- A persistent help panel sits on the right; the "?" beside any node dialog opens node-specific help.
- A private asset library holds reference images, scenes and characters — drag one onto the canvas to reuse it as a node input.
The node pipeline
The pipeline runs in eight stages. Confirm each output before the next step executes.
| # | Node | What it produces |
|---|---|---|
| 1 | Script | Expands a one-line idea into a full script |
| 2 | Episodes | Splits a long script into episodes |
| 3 | Storyboard | A shot list with camera, blocking and dialogue |
| 4 | Scene / Character | Scene art and character sheets |
| 5 | Keyframes | First-frame art for every shot |
| 6 | Video clips | AI-animated footage for each shot |
| 7 | Dubbing | One-pass voice-over for all lines |
| 8 | Compose | Concatenated, subtitled, mixed MP4 |
Single-node rerun: if you don't like one result, rerun just that node. Everything downstream that you already approved is kept.
Timeline, storyboard and review
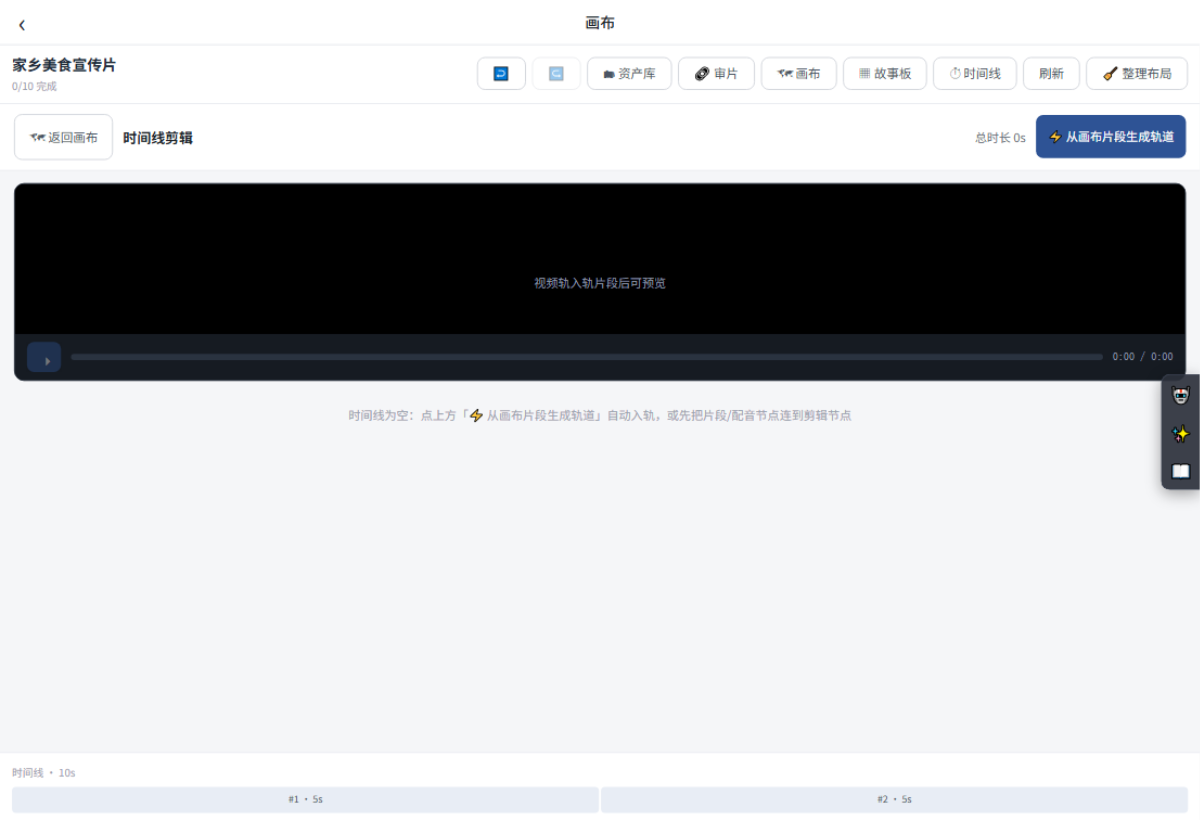
Editing nodes carry a multi-track timeline. Use Build tracks from canvas clips to lay finished clips and dubbing onto tracks in storyboard order automatically, then preview video tracks in sequence (audio tracks mix in at compose time).
- Browse every shot in the storyboard and export SRT subtitles or a CSV shot list.
- Create a review link with optional watermark, expiry date and password.
- Clients comment per shot and timecode — no account needed on their side.
Teams and credits
Create a team, invite members and assign projects to the team space. Team projects draw from a shared credit pool, and every action is logged.
- Five roles: owner, admin, editor, reviewer, viewer.
- Credit pool: team generations freeze and settle from the pool; admins transfer from a personal balance, with a ledger everyone can see.
- Approvals: editors submit requests; reviewers and above approve or reject — no self-review.
- Seats follow the owner's plan: 3 on Free, 5 on paid plans, 20 on Studio.
How credits are billed
Billing is transparent and uses a precheck → freeze → settle flow.
- Monthly plan credits equal monthly fee × 100 (so $1 = 100 credits).
- Every generation draws credits at the model's real unit rate — you pay for exactly what you use.
- The balance is checked before submission, frozen while the job runs and settled on completion.
- Failed generations are refunded in full — to your personal account or the team pool.
The desktop app
The Windows client is a lightweight installer with no dependencies. The cloud generates all assets; the desktop app imports the project and finishes the final cut on your machine, so editing is faster and never queues. Billing stays on your cloud account, and the cloud pre-freezes credits until the film uploads (with an automatic refund if the client goes offline).
Troubleshooting
"Please log in" when I generate
Click the avatar pill at the top-left and sign in. New accounts receive 100 free credits.
"Plan required"
Video generation needs a plan with video credits. Follow the prompt to open the plans page — it takes effect as soon as payment succeeds.
A generation failed
Failed tasks cost nothing: the pre-frozen amount is refunded in full. Adjust the parameters and rerun just that node.